Super Bowl Party Food Savory Hand Pies
Uitgelicht onder: Feestelijke seizoensgebonden favorieten
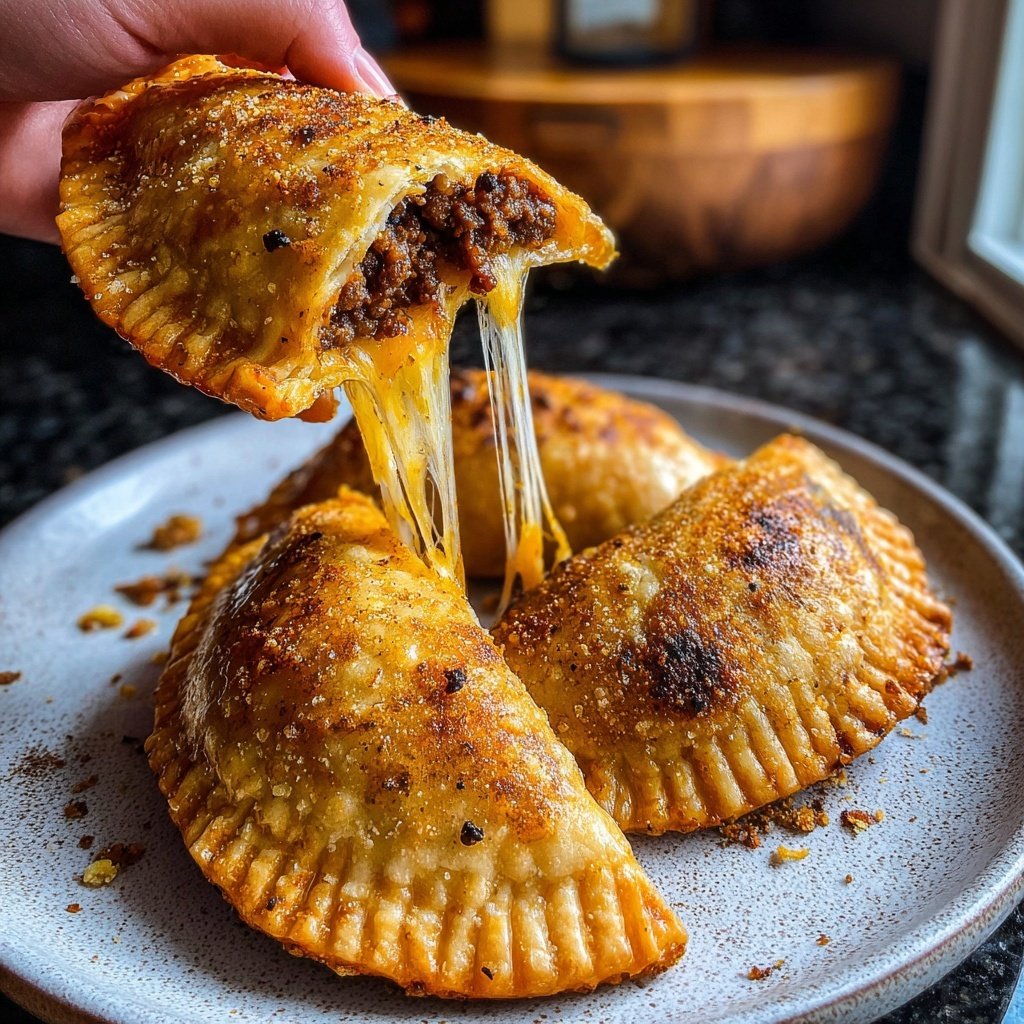
I absolutely love making savory hand pies for Super Bowl parties! They're the perfect snack for gathering around the TV with friends. The flaky, buttery crust combined with a variety of delicious fillings makes for an irresistible treat. Plus, they can be made ahead of time, which is a huge time-saver on game day. Whether it's beef, chicken, or veggies, each bite is packed with flavor. I guarantee these hand pies will score big with everyone in the room!
When preparing these hand pies, I experimented with various fillings to suit everyone’s taste. My favorite combination includes spicy beef and gooey cheese, while my friends rave about the creamy chicken and mushroom filling. The trick is to balance the flavors without overpowering the flaky crust. I learned that letting the dough rest for a bit makes it much easier to roll out, resulting in a superior crust.
One game day, I even made a batch with a vegetable filling for my vegetarian friends, and they were a hit! It’s all about getting creative with what ingredients you have on hand. Baking them until they’re golden brown gives the perfect crunch, and I love serving them with a variety of dipping sauces for an extra punch!
Why You'll Love These Hand Pies
- Flaky and buttery crust that's always a crowd-pleaser
- Versatile fillings to cater to everyone's taste buds
- Perfectly portable for easy snacking during the game
Choosing Your Fillings
While this recipe features savory ground beef and cheese, consider mixing it up with different proteins or vegetables—such as shredded chicken, sautéed mushrooms, or spinach. Each filling brings its own unique flavor profile. If you’d like a vegetarian option, try using a mix of roasted vegetables and feta cheese for a delicious contrast. Just remember, if you use a wet filling, drain excess moisture to avoid a soggy crust.
For those watching their cholesterol, lean ground turkey or plant-based meat alternatives can work wonderfully without sacrificing flavor. Experiment with spices like cumin or smoked paprika to elevate your filling. Just be mindful that certain spices can intensify in the baking process, so start with a small amount and adjust to your taste.
Perfecting the Dough
The key to a flaky crust lies in how you handle the butter. Ensure it's very cold; you can even freeze it for 10-15 minutes before using. When cutting in the butter, aim for pea-sized pieces—this will create pockets for steam during baking that contribute to the flakiness. Avoid overworking the dough; just mix until blended. If it feels too crumbly, add a teaspoon of cold water gradually until it holds together.
Make sure to chill the dough for at least 30 minutes. This helps relax the gluten, preventing a tough crust. If you need to make the dough in advance, wrap it tightly and store it in the fridge for up to two days, or freeze it for up to three months. Just thaw in the fridge overnight before using.
Storage and Serving Suggestions
These hand pies are not just a game-day treat; they also make fantastic leftovers. Once baked, allow them to cool completely then store in an airtight container. They’ll last in the refrigerator for up to three days. For longer storage, freeze them before baking. Place the uncooked pies on a baking sheet, freeze until solid, and then transfer to a zip-top bag. They can be baked directly from the freezer, adding an extra 5-10 minutes to the cooking time.
Serving options are endless! For a flavor boost, pair your hand pies with options like a tangy dipping sauce or a yogurt-based dip. Consider a chipotle aioli or homemade ranch for a flavorful complement. They’re perfect for portion control, making it easy to serve and share while enjoying the game with friends.
Ingrediënten
Gather these ingredients before you start:
For the Dough
- 3 cups all-purpose flour
- 1 teaspoon salt
- 1 cup unsalted butter, chilled and cubed
- 1/4 cup cold water
For the Filling
- 1 lb ground beef (or chicken)
- 1 cup shredded cheese
- 1/2 cup diced onions
- 1 tablespoon Worcestershire sauce
- Salt and pepper to taste
Ensure all ingredients are prepped and ready to go!
Bereidingswijze
Follow these steps to make your hand pies:
Prepare the Dough
In a large bowl, mix the flour and salt. Cut in the butter until the mixture resembles coarse crumbs. Stir in cold water, a tablespoon at a time, until the dough comes together. Divide the dough into two discs, wrap in plastic, and refrigerate for 30 minutes.
Make the Filling
In a skillet over medium heat, brown the ground beef along with the onions. Drain excess fat, add Worcestershire sauce, salt, and pepper. Stir in shredded cheese until melted. Let the filling cool.
Assemble the Hand Pies
Preheat your oven to 375°F (190°C). Roll out one dough disc on a floured surface to about 1/8 inch thick. Cut out circles using a large cookie cutter. Fill each circle with a spoonful of filling, fold over, and seal the edges with a fork.
Bake the Hand Pies
Place the sealed pies on a parchment-lined baking sheet. Bake for 25 minutes or until golden brown. Let them cool for a few minutes before serving.
Enjoy your delicious hand pies fresh out of the oven!
Professionele Tips
- Feel free to get creative with the fillings! Leftover roasted vegetables or different types of meats work wonderfully. To make them even more appealing, brush the tops with an egg wash before baking for a beautiful golden finish.
Tips for Browning the Filling
To achieve a deeply flavored filling, be sure to brown the ground beef fully before adding the other ingredients. This not only enhances the flavor but also contributes to a richer filling. Cook it over medium heat, breaking it apart with a spatula to ensure even browning, which usually takes about 5-7 minutes. If you see any juices pooling, drain them off to avoid a soggy filling.
Adding the onions at the same time as the beef allows them to caramelize slightly, which adds to the overall flavor. If you prefer a milder onion taste, consider cooking them separately until translucent, then adding them to the beef once cooked.
Adjusting Cooking Time
When it comes to baking, every oven is different. Keep an eye on the hand pies to ensure they're perfectly golden brown; you should see the crust turning slightly darker around the edges. If you notice that the tops are browning too quickly but the insides aren’t cooked, you can cover them loosely with aluminum foil to prevent burning. Adjusting baking time by even a couple of minutes can make a difference, so check around the 20-minute mark if you have a particularly hot oven.
If you choose to make larger pies, you may need to increase your baking time by 5-10 minutes. To ensure even cooking, you might also want to rotate your baking sheet halfway through the process.
Customizing the Seasoning
Feel free to personalize the seasoning in your filling. Swapping Worcestershire sauce for soy sauce will give a different umami flavor. You can also boost the richness with a dash of hot sauce or some diced jalapeños for an added kick. Just be cautious, as spices can intensify in the baking process, so start small, taste, and adjust.
Fresh herbs like parsley, cilantro, or basil can be added just before folding the filling into the crust for a fresh burst of flavor. Experimentation is encouraged; after all, the beauty of hand pies is their versatility!
Vragen Over Recepten
→ Can I make the dough ahead of time?
Yes! You can prepare the dough a day in advance and keep it wrapped in the fridge.
→ What can I use for a vegetarian filling?
Try a mix of sautéed vegetables, beans, and cheese for a hearty vegetarian option.
→ Can these hand pies be frozen?
Absolutely! Unbaked hand pies can be frozen for up to 3 months. Just bake directly from frozen, adding a few extra minutes to the baking time.
→ What dipping sauce pairs well with these hand pies?
A simple ranch dressing or spicy salsa complements the flavors nicely!

Super Bowl Party Food Savory Hand Pies
Gemaakt door: Hannah Lewis
Recepttype: Feestelijke seizoensgebonden favorieten
Vaardigheidsniveau: Intermediate
Eindportie: 12 servings
Wat je Nodig Hebt
For the Dough
- 3 cups all-purpose flour
- 1 teaspoon salt
- 1 cup unsalted butter, chilled and cubed
- 1/4 cup cold water
For the Filling
- 1 lb ground beef (or chicken)
- 1 cup shredded cheese
- 1/2 cup diced onions
- 1 tablespoon Worcestershire sauce
- Salt and pepper to taste
Stappen
In a large bowl, mix the flour and salt. Cut in the butter until the mixture resembles coarse crumbs. Stir in cold water, a tablespoon at a time, until the dough comes together. Divide the dough into two discs, wrap in plastic, and refrigerate for 30 minutes.
In a skillet over medium heat, brown the ground beef along with the onions. Drain excess fat, add Worcestershire sauce, salt, and pepper. Stir in shredded cheese until melted. Let the filling cool.
Preheat your oven to 375°F (190°C). Roll out one dough disc on a floured surface to about 1/8 inch thick. Cut out circles using a large cookie cutter. Fill each circle with a spoonful of filling, fold over, and seal the edges with a fork.
Place the sealed pies on a parchment-lined baking sheet. Bake for 25 minutes or until golden brown. Let them cool for a few minutes before serving.
Extra Tips
- Feel free to get creative with the fillings! Leftover roasted vegetables or different types of meats work wonderfully. To make them even more appealing, brush the tops with an egg wash before baking for a beautiful golden finish.
Voedingswaarde (Per Portie)
- Calories: 320 kcal
- Total Fat: 24g
- Saturated Fat: 10g
- Cholesterol: 50mg
- Sodium: 250mg
- Total Carbohydrates: 26g
- Dietary Fiber: 1g
- Sugars: 2g
- Protein: 8g