Dairy-Free Banana Bread Recipe
Uitgelicht onder: Favoriete zelfgebakken lekkernijen
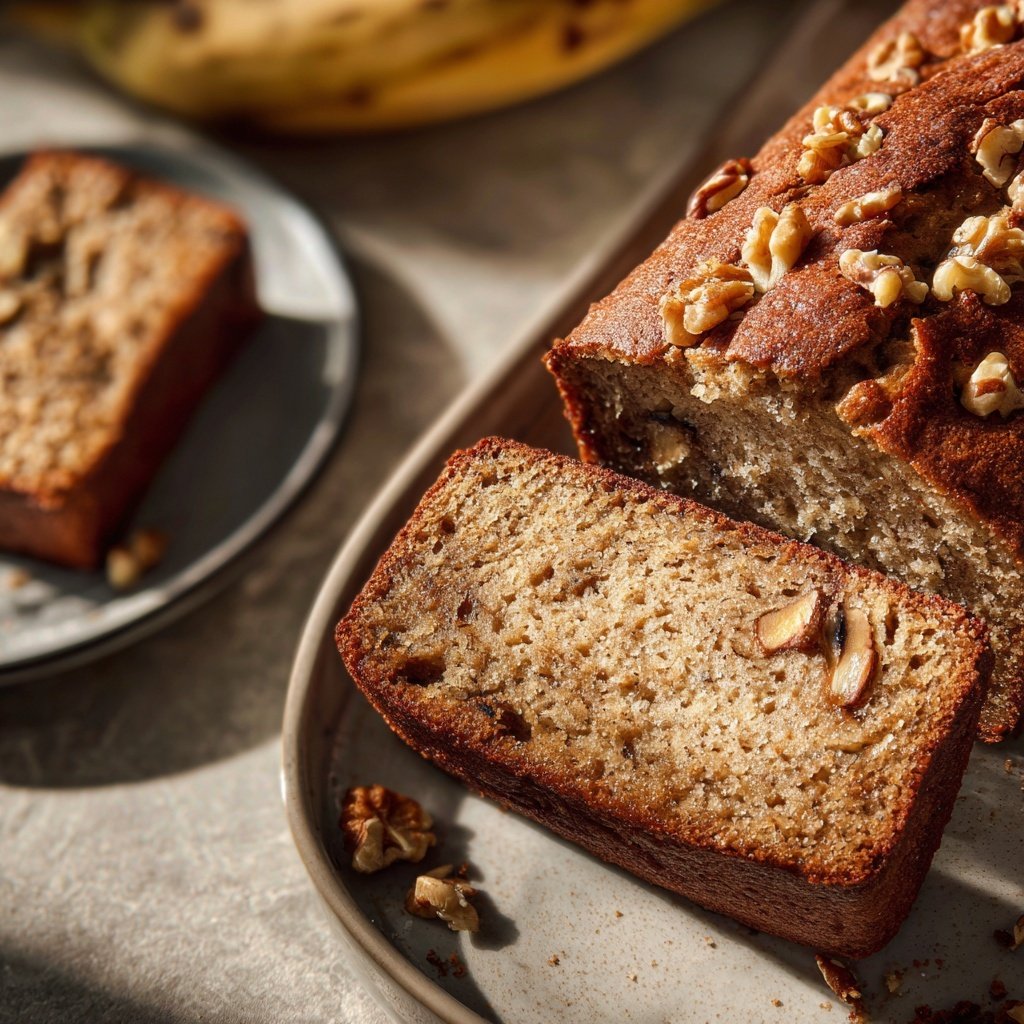
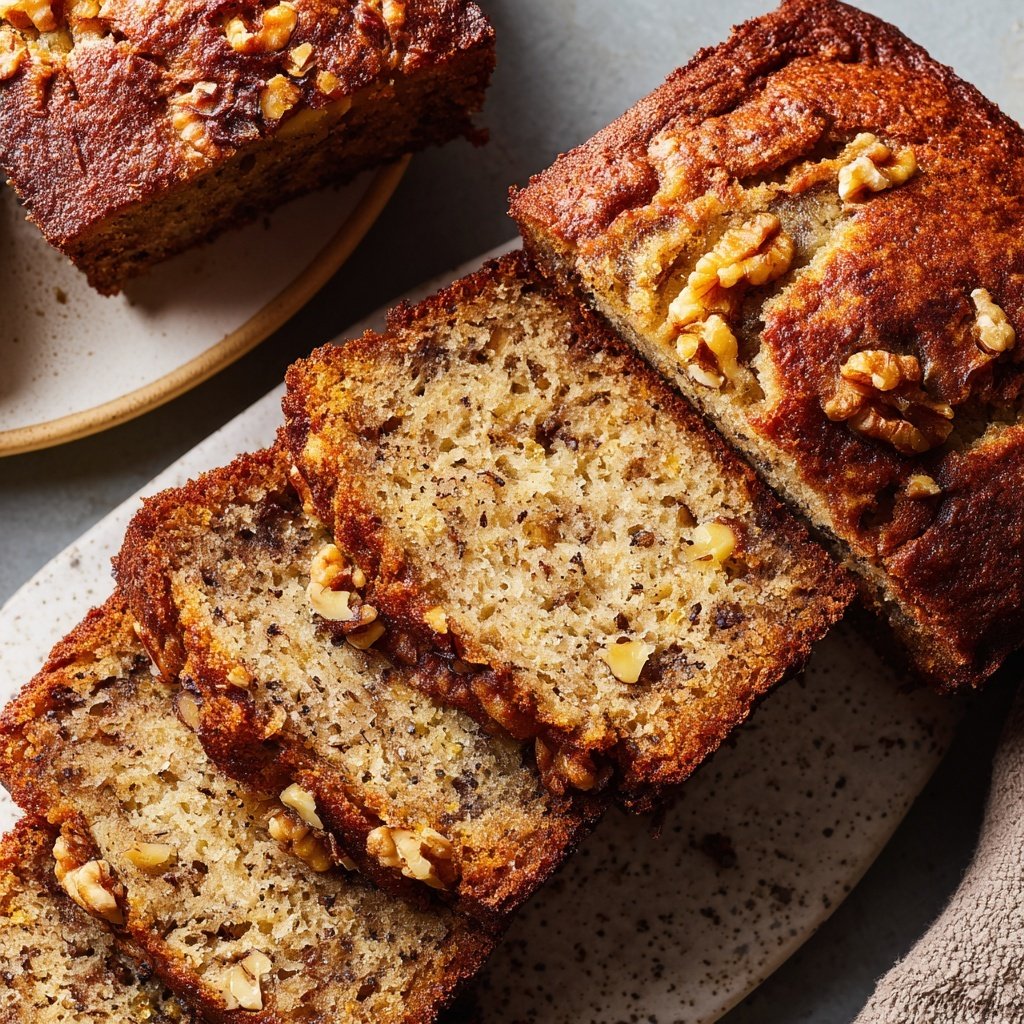
I love baking, and this Dairy-Free Banana Bread has become a staple in my kitchen. The moment I pull it out of the oven, the sweet aroma fills the air, promising a delightful treat. I’ve experimented extensively with different dairy-free options, and this recipe uses almond milk and coconut oil, which bring a moist texture without sacrificing flavor. Each bite is a perfect balance of sweetness and banana goodness, making it an ideal snack for any time of the day or a breakfast on the go.
When I first tried to make banana bread without dairy, I was skeptical. Using almond milk instead of traditional dairy made my loaf incredibly moist without any strange aftertastes. Another tip I discovered was to add a sprinkle of cinnamon, which makes a world of difference in enhancing the banana flavor. I’ve created a version that I’m genuinely proud of.
This banana bread is versatile; you can throw in some nuts or chocolate chips if you wish. Each slice comes out perfectly, with a golden crust that hugs the fluffy interior. It’s an absolute crowd-pleaser, and I always make sure to stash a loaf in the freezer for those unexpected cravings!
Why You Will Love This Recipe
- Moist and tender crumb from the perfect ripeness of bananas
- Naturally sweet, making it a healthier snack option
- Customizable with your favorite add-ins like nuts or chocolate
Mastering the Banana Ripeness
The success of this Dairy-Free Banana Bread primarily hinges on the ripeness of your bananas. Choose bananas that are heavily speckled with brown spots; these not only provide maximum sweetness but also enhance the moisture content of the bread. If you have green bananas, place them in a brown paper bag at room temperature to speed up the ripening process. Usually, in 1-2 days, you'll have perfectly ripe bananas ready for baking.
When mashing the bananas, aim for a consistency that leaves few lumps. This ensures that the banana flavor is evenly distributed throughout the bread. I recommend using a fork or a potato masher for this task; it gives you good control over the texture. A fine mash also integrates better with the other wet ingredients, resulting in a uniform batter that bakes beautifully.
Baking Tips for Perfect Texture
For a tender crust and moist interior, it’s crucial not to overmix the batter after combining wet and dry ingredients. Stir just until no flour pockets remain visible; this keeps the gluten in check and avoids a dense loaf. Also, make sure your oven is fully preheated before inserting the banana bread. An uneven baking temperature could lead to a sunken middle or overly dry edges, compromising both texture and taste.
Utilizing a digital kitchen scale for measuring ingredients can contribute to consistent results, especially if you regularly bake. Flour can often be compacted in a measuring cup, leading to excess flour in your batter. Weighing it out will ensure you have the proper balance of ingredients, keeping your banana bread light and fluffy every time!
Ingrediënten
Gather the following ingredients to get started:
Ingredients
- 3 ripe bananas, mashed
- 1/3 cup melted coconut oil
- 1/2 cup brown sugar
- 1/4 cup almond milk
- 1 teaspoon vanilla extract
- 1 teaspoon baking soda
- 1/4 teaspoon salt
- 1 cup all-purpose flour
- 1/2 teaspoon cinnamon (optional)
- 1/4 cup nuts or chocolate chips (optional)
Make sure all ingredients are at room temperature for the best results.
Bereidingswijze
Ready to bake? Follow these simple steps:
Preheat Oven
Preheat your oven to 350°F (175°C) and grease a loaf pan.
Mix Wet Ingredients
In a large bowl, combine the mashed bananas, melted coconut oil, brown sugar, almond milk, and vanilla extract until smooth.
Combine Dry Ingredients
In another bowl, whisk together the baking soda, salt, and flour. If using cinnamon, add it here as well.
Mix Everything Together
Slowly add the dry ingredients to the wet ingredients. Stir until just combined; be careful not to overmix. Fold in any optional nuts or chocolate chips.
Bake
Pour the batter into the prepared loaf pan and bake for 50 minutes, or until a toothpick inserted in the center comes out clean.
Cool and Serve
Let the banana bread cool in the pan for 10 minutes before transferring it to a wire rack to cool completely. Slice and enjoy!
This banana bread can be enjoyed warm or at room temperature. Perfect with a cup of coffee!
Professionele Tips
- For an extra touch, try adding a sprinkle of crushed nuts on top before baking for a delightful crunch.
Storage and Freezing
To maintain the freshness of your Dairy-Free Banana Bread, store it at room temperature, covered in plastic wrap or in an airtight container. This will keep it soft for about 3-4 days. If you prefer your banana bread chilled, popping it in the refrigerator is also an option but may slightly alter the texture, making it a bit denser.
For long-term storage, you can freeze the banana bread once it has cooled completely. Wrap individual slices or the whole loaf tightly in plastic wrap and then in aluminum foil. This double wrapping helps prevent freezer burn and keeps the flavor intact. You can store it for up to 3 months; simply thaw at room temperature or pop a slice in the toaster for a warm treat!
Customizing Your Recipe
The beauty of this Dairy-Free Banana Bread lies in its versatility. You can cater it to your taste preferences by adding various mix-ins. For a nutty flavor, opt for chopped walnuts or pecans. If you’re a chocolate lover, fold in dairy-free chocolate chips to create an indulgent treat. Remember to adjust the amount of sugar if you’re adding sweet ingredients like dried fruit or honey.
You can also experiment with spices to enhance the flavor. For instance, a dash of nutmeg can add warmth, while a mixture of cardamom and ginger provides an aromatic kick. This recipe serves as a great base for your creativity, and I’ve found that pairing different spices and add-ins can lead to delightful surprises in flavor!
Vragen Over Recepten
→ Can I use other plant-based milk?
Absolutely! You can substitute almond milk with oat milk, soy milk, or any other dairy-free milk you prefer.
→ How ripe should the bananas be?
The riper, the better! Overripe bananas with lots of brown spots are ideal as they are sweeter and more flavorful.
→ Can I freeze banana bread?
Yes, you can freeze banana bread! Wrap it tightly in plastic wrap, then foil, and it can last up to 3 months.
→ What can I add for extra flavor?
Consider adding chopped nuts, chocolate chips, or dried fruit. You can also try different spices like nutmeg or cardamom.
Dairy-Free Banana Bread Recipe
Gemaakt door: Hannah Lewis
Recepttype: Favoriete zelfgebakken lekkernijen
Vaardigheidsniveau: Beginner
Eindportie: 1 loaf
Wat je Nodig Hebt
Ingredients
- 3 ripe bananas, mashed
- 1/3 cup melted coconut oil
- 1/2 cup brown sugar
- 1/4 cup almond milk
- 1 teaspoon vanilla extract
- 1 teaspoon baking soda
- 1/4 teaspoon salt
- 1 cup all-purpose flour
- 1/2 teaspoon cinnamon (optional)
- 1/4 cup nuts or chocolate chips (optional)
Stappen
Preheat your oven to 350°F (175°C) and grease a loaf pan.
In a large bowl, combine the mashed bananas, melted coconut oil, brown sugar, almond milk, and vanilla extract until smooth.
In another bowl, whisk together the baking soda, salt, and flour. If using cinnamon, add it here as well.
Slowly add the dry ingredients to the wet ingredients. Stir until just combined; be careful not to overmix. Fold in any optional nuts or chocolate chips.
Pour the batter into the prepared loaf pan and bake for 50 minutes, or until a toothpick inserted in the center comes out clean.
Let the banana bread cool in the pan for 10 minutes before transferring it to a wire rack to cool completely. Slice and enjoy!
Extra Tips
- For an extra touch, try adding a sprinkle of crushed nuts on top before baking for a delightful crunch.
Voedingswaarde (Per Portie)
- Calories: 210 kcal
- Total Fat: 9g
- Saturated Fat: 7g
- Cholesterol: 0mg
- Sodium: 100mg
- Total Carbohydrates: 36g
- Dietary Fiber: 2g
- Sugars: 15g
- Protein: 2g